Fan Micro Car DIY STEM Kit
$9.99$4.95
Posted on: Jun 6, 2005

Sometimes seeing a shadow can be as good or better than seeing the real thing. A new measurement method* developed by researchers working at the National Institute of Standards and Technology (NIST) is a case in point. The method uses the shadow cast by a small glass probe to infer the dimensions of tiny, microscale holes or other micrometer-sized components. The technique may provide an improved quality control method for measuring the interior dimensions of fuel nozzles, fiber optic connectors, biomedical stents, ink jet cartridges and other precision-engineered products.
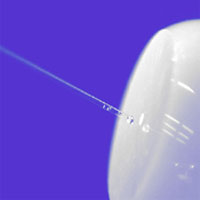
Designed to be implemented with the type of coordinate measuring machine (CMM) routinely used in precision manufacturing settings, the method uses a flexible glass fiber with a microsphere attached on one end. The glass probe is attached to the CMM’s positioning system, inserted into the part to be measured, and systematically touched to the part’s interior walls in multiple locations. A light-emitting diode is used to illuminate the glass fiber. While the microsphere inside the part is not visible, the shadow of the attached fiber—with a bright band of light at its center—shows the amount of deflection in the probe each time the part’s interior is touched. A camera records the shadow positions. Based on prior calibration of the force required to bend the probe a specific distance, the part’s dimensions can be determined with an uncertainty of about 35 nanometers (nm). The method can be used for holes as small as 100 micrometers in diameter.
’Our probe has a much smaller measurement uncertainty than other available methods and it is very cost effective to make,’ says Bala Muralikrishnan, a NIST guest researcher from the University of North Carolina at Charlotte.
The thin, glass fiber is about 20 millimeters long and 50 micrometers in diameter, making it especially useful for measuring relatively deep holes not easily measured with other methods. Replacement probes cost about $100 compared to about $1,000 for those manufactured using silicon micromachining techniques.
*B. Muralikrishnan, J.A. Stone and J. R. Stoup. Measuring internal geometry of fiber ferrules. Presented at the SME MicroManufacturing Conference, Minneapolis, Minn., May 4-5, 2005.
 'I have deep faith that the principle of the universe will be beautiful and simple.'